

Coinagea year ago
5-Step Commercial Dryer Maintenance Checklist
We specialize in providing the best in commercial laundry services, tailored to fit a variety of needs, from bustling businesses to cozy apartments.

Maintaining your commercial dryers is essential to keep your laundry operation running safely and efficiently. Whether you manage a laundromat, oversee a multi‑family housing laundry room, or run on‑premises hotel dryers, a proactive maintenance routine will save you money and prevent costly downtime. Below is a 5‑step commercial dryer maintenance checklist that is brand‑agnostic (applicable to any commercial dryer model). Each step includes actionable sub‑tasks, recommended frequency, and the benefits of doing the maintenance—as well as the consequences if you neglect it. By following this checklist, you’ll extend the life of your equipment, improve drying performance, and reduce safety hazards.

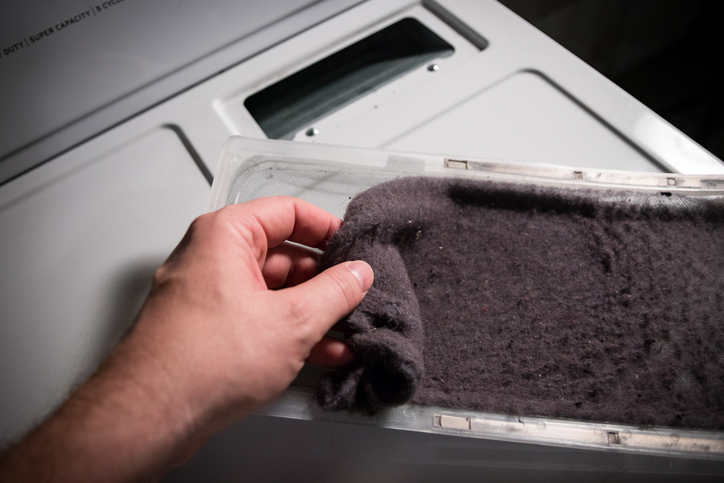
Step 1: Clean the Lint Traps and Screens (Daily)
One of the simplest yet most crucial maintenance tasks is cleaning the dryer’s lint trap. Clogged lint filters are a leading cause of dryer inefficiency and fires, as they restrict airflow and cause overheating. Lint buildup is cited as the leading cause of nearly 15,000 dryer fires each year. By making lint removal a habit every day (or after each use), you ensure proper airflow through the dryer, which keeps drying times short and energy usage low. Neglecting this step will result in longer drying cycles, higher utility bills, and a dangerous risk of overheating or fire.
Actionable steps
- After every load: Remove the lint screen before or after each cycle and peel off the accumulated lint.
- Weekly deep clean: Vacuum the lint trap housing with a crevice attachment, then rinse the lint screen in warm, soapy water to remove fabric‑softener residue. Dry completely before reinserting.
- Inspect for damage: Check the screen for rips or warping and ensure it fits snugly. Replace damaged screens immediately.
Benefits
- Faster drying cycles and lower energy costs.
- Dramatically reduced fire hazard.
- Cooler, more efficient operation.
Consequences of neglect
- Longer dry times and higher utility bills.
- Overheating that can blow thermal fuses or trip safety cut‑offs.
- Severe fire risk if lint ignites inside the machine.
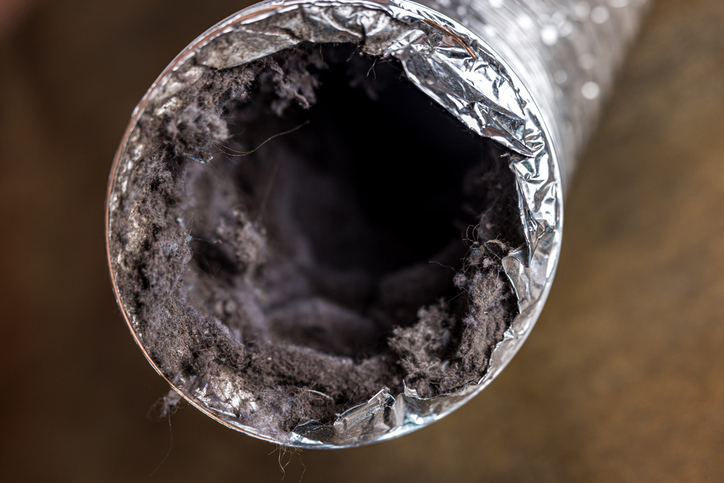
Step 2: Inspect and Clean the Dryer Exhaust Vent (Monthly)
Even if you diligently clean lint screens, some lint and debris travel into the venting system. Over time, the exhaust duct can become lined with lint. A clogged dryer vent is an even greater fire hazard than a clogged lint trap because a spark or excessive heat can ignite a serious blaze. Blocked vents also reduce drying efficiency—if you notice loads taking longer to dry or the dryer cabinet becoming overly hot, that’s a warning sign of an obstructed vent.
Actionable steps
- Monthly inspection: Look behind the dryer for crushed or kinked ducts and check the exterior vent outlet to be sure it opens freely.
- Quarterly deep clean:
- Unplug the dryer (and turn off gas supply for gas models).
- Disconnect the vent duct and vacuum lint from both the duct and the dryer’s exhaust port.
- Use a dryer‑vent brush to scrub inside the duct, then vacuum again.
- Clean the exterior vent cover and remove any nests or debris.
- Reattach the duct securely, ensuring all connections are tight and undamaged.
- Replace flimsy ducting: Upgrade vinyl or thin foil ducts to smooth metal pipe, which resists crushing and collects less lint.
Benefits
- Shorter drying times and lower energy consumption.
- Greatly reduced risk of lint‑related fires.
- Stable operating temperature that’s kinder to linens and components.
Consequences of neglect
- High fire danger in lint‑packed ducts.
- Overheating that can damage heating elements or burners.
- Potential carbon‑monoxide back‑drafts in gas dryers.
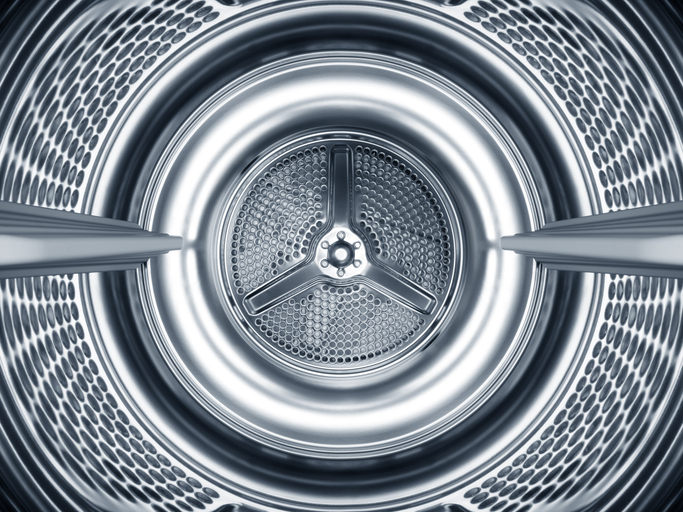
Step 3: Clean the Dryer Interior and Moisture Sensors (Monthly)
Lint and residue can accumulate inside the drum, around the drum seals, and especially on moisture sensors. Dirty sensors may cause the dryer to run too long or shut off too early, while residue inside the drum can stain fabrics or attract lint.
Actionable steps
- Wipe the drum and seals monthly:
- Power off and unplug the dryer.
- Use a cloth with mild detergent to wipe the drum and door opening. For waxy buildup, use white vinegar.
- Wipe again with clean water and dry the drum.
- Clean moisture sensors: Gently wipe sensor bars with a cotton ball dampened with rubbing alcohol.
- Vacuum inside the cabinet (every 6 months): Remove access panels and vacuum lint from the motor, blower, and heating element areas—call a professional if you’re not comfortable.
Benefits
- Accurate moisture readings for optimal drying.
- Fresher, more hygienic dryer interior.
- Lower risk of internal lint fires and component overheating.
Consequences of neglect
- Cycles that over‑dry or under‑dry laundry.
- Lint deposits on clothes or inside the drum.
- Increased chance of internal fire near heating elements.
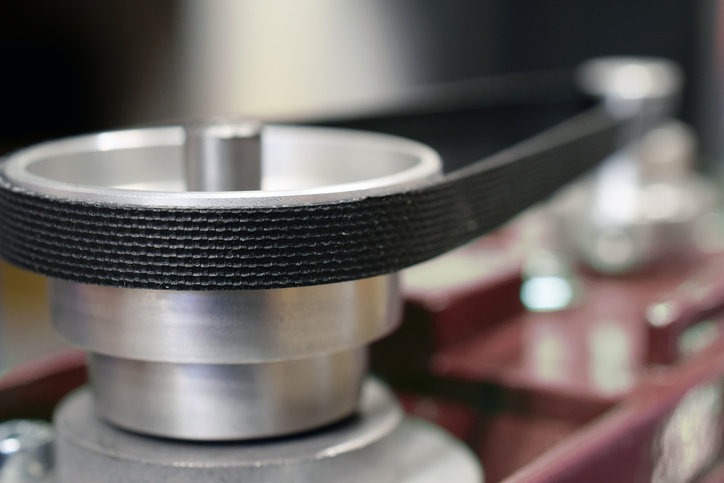
Step 4: Inspect Belts, Motors, and Other Mechanical Parts (Quarterly)
The drive belt, drum rollers, blower fan, and motor all experience wear. Listening for unusual noises and performing quarterly inspections prevents sudden breakdowns.
Actionable steps
- Listen and observe: Track any new squeaks, squeals, or thumps.
- Quarterly visual check:
- Inspect the drive belt for cracks or glazing; replace if worn.
- Spin the drum by hand to check rollers or bearings; they should rotate smoothly.
- Ensure the idler pulley spins freely and maintains belt tension.
- Clean the blower fan: Remove lint from blades and check for wobble.
- Monitor motor health: Feel for excessive heat or odors; address immediately.
Benefits
- Maximum uptime and fewer emergency repairs.
- Improved energy efficiency thanks to free‑spinning components.
- Longer equipment lifespan.
Consequences of neglect
- Belt snaps leading to downtime and lost revenue.
- Worn supports that damage drums or motors.
- Overheated motors requiring costly replacements.
Step 5: Verify Safety Features and Schedule Preventative Maintenance (Periodically)
Safety components like door switches, thermostats, and gas connections must work flawlessly. Regular verification and professional servicing complete your maintenance program.
- Test door switch and latch: The drum should stop immediately when the door opens. Replace faulty switches or worn latches.
- Verify temperature controls: Observe cycles for proper heat and cooldown. If clothes emerge scorched or damp, sensors may need calibration or replacement.
- Check electrical and gas connections:
- Inspect power cords for fraying or discoloration.
- For gas models, look for leaks with a soapy‑water solution and ensure the flame is strong and blue.
- Keep the area clean and level: Vacuum lint around machines and ensure no combustibles are nearby. Adjust leveling feet to minimize vibration.
- Schedule professional service: Arrange quarterly or semi‑annual technician visits for deep inspections, calibrations, and part replacements.
Benefits
- Safe operation that protects users and property.
- Early detection of thermostat, sensor, or gas issues.
- Compliance with safety standards and insurance requirements.
Consequences of neglect
- Hazardous conditions such as spinning drums with open doors, gas leaks, or electrical hot spots.
- Chronic inefficiencies and higher energy costs.
- Potential for catastrophic equipment failure or fire.
Quick‑Reference Commercial Dryer Maintenance Checklist
(Print or copy this list and keep it near your laundry equipment.)
Step 1 – Lint Trap & Screen (Daily / Weekly)
- Remove lint from screen.
- Vacuum lint‑trap housing and wash screen in warm, soapy water; dry completely.
- Inspect screen for rips, warping, or poor fit; replace if damaged.
Step 2 – Exhaust Vent & Duct (Monthly / Quarterly)
- Check transition duct for kinks or crushing; clear lint around exterior vent hood.
- Unplug dryer (shut off gas if applicable), disconnect duct, vacuum inside dryer outlet and entire duct run, brush interior, and re‑attach.
- Replace flimsy vinyl/foil ducting with rigid or semi‑rigid metal if found.
Step 3 – Drum Interior & Moisture Sensors (Monthly / 6‑Monthly)
- Wipe drum, door seal, and opening with mild detergent; rinse and dry.
- Clean moisture‑sensor bars with rubbing‑alcohol–damp cloth or cotton ball.
- Remove access panel; vacuum lint from motor, blower, and heating element areas (or schedule a technician).
Step 4 – Belts, Rollers, Blower & Motor (Quarterly)
- Listen for squeaks, thumps, or grinding; investigate immediately.
- Open access panel:
- Check drive belt for cracks/glazing; confirm proper tension.
- Spin drum by hand; rollers/ bearings should turn smoothly.
- Ensure idler pulley and blower wheel spin freely and are lint‑free.
- Look for motor overheating signs (burning smell, excessive heat).
Step 5 – Safety & Preventative Service (Quarterly / Annually)
- Test door switch: drum must stop when door opens; fix faulty latch or switch.
- Observe a full cycle: confirm correct heating, cooldown, and shut‑off.
- Inspect power cord or gas line for damage; tighten electrical terminals, soap‑test gas fittings for leaks.
- Vacuum lint under/around machines; keep area clear of combustibles; verify dryers are level.
- Schedule professional inspection: thermostat calibration, gas‑pressure check, deep vent cleaning, and replacement of worn parts.
Pro Tip
Maintain a simple log (date | task | initials) so staff can mark each item completed. Consistent, documented upkeep reduces downtime, energy costs, and safety risks—and extends the life of your equipment.
Conclusion
Keeping up with this 5‑step maintenance checklist will ensure your commercial dryers operate safely, efficiently, and reliably. By cleaning lint filters and vents, you prevent fires and improve performance; by tending to sensors, seals, and mechanical parts, you avoid breakdowns and preserve your equipment’s lifespan. Preventative maintenance is always easier and cheaper than emergency repairs. Implement a schedule (daily, weekly, monthly, and quarterly tasks as noted) and log your maintenance actions.
Even with diligent in‑house upkeep, you should consider partnering with professionals for advanced care. Commercial Laundries Florida offers expert repair services and comprehensive preventative‑maintenance plans to keep your laundry equipment in top shape. Our trained technicians can perform thorough inspections, cleanings, and adjustments beyond this basic checklist—ensuring burners are tuned, sensors are calibrated, and worn parts are replaced before failure. We also provide commercial laundry‑equipment leasing options, which can be a cost‑effective way to upgrade your machines and reduce maintenance worries. Contact Commercial Laundries Florida to learn more about our maintenance plans, repair services, or equipment leasing programs. With the right care and support, your dryers will serve you reliably for years to come, keeping your operation running smoothly and your patrons happy.